Category Archives: Food

Umm ali (Egyptian Bread & Butter Pudding)

An Egyptian pudding popular across the Arab world, a bit like a bread-and-butter pudding. Instead of flatbread, pieces of baked pastry can also be used, as I do here.
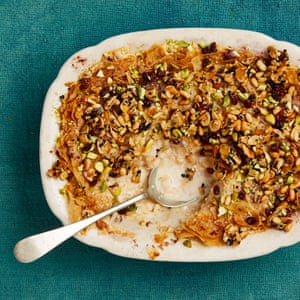
Yotam Ottolenghi’s umm ali – a creamy Egyptian pud with a nutty crust.
 

Prep 10 min
Infuse 1 hr+
Cook 1 hr 25 min
Serves 4-6

700ml whole milk
300ml double cream
15 cardamom pods, roughly bashed open in a mortar
2 cinnamon sticks
125g caster sugar
6 feuilles de filo pastry (120g)
60g unsalted butter, melted 
2 tsp runny honey
40g pine nuts
30g flaked almonds
1½ tsp white sesame seeds 
1½ tsp black sesame seeds 
1 tsp olive oil
1 tsp rose water 
1 pinch flaked sea salt
30g desiccated coconut, lightly toasted 
½ tsp ground cinnamon
20g pistachio kernels, finely chopped
1½ tbsp barberries, soaked in hot water for 20 minutes, then drained

Heat the oven to 170C (160C fan)/350F/gas 4. Put the milk, cream, cardamom and cinnamon in a medium saucepan, turn on the heat to medium-low, cover and cook for 20 minutes, or until steaming and just beginning to bubble. Turn off the heat and leave to infuse for at least an hour (or refrigerate overnight). Strain through a sieve set over a bowl (discard the solids), then pour back into the pan and add 70g sugar. Bring to a simmer on a medium heat, stirring from time to time, then set aside and keep warm.

Lay out one filo sheet on a clean work surface and brush liberally with melted butter and a teaspoon and a half of caster sugar. Top with another sheet of filo and repeat until you’ve used up all the filo and melted butter and 45g of the sugar. Transfer to a large oven tray lined with greaseproof paper and bake for 20 minutes, until golden. Remove from the oven, set aside to cool, then break into jagged, roughly 10cm pieces; it’s fine if they flake apart a little.

Put the honey, pine nuts, almonds, sesame seeds, oil, rose water and a pinch of flaked sea salt in a small bowl and mix well. Transfer to a small oven tray lined with greaseproof paper, bake for eight minutes, then stir and bake for four minutes more, or until golden. Remove from the oven, leave to cool for 10 minutes, then break into small clusters.

Turn up the oven to 190C (180C fan)/390F/gas 6. To assemble the dish, arrange half the baked filo pieces in a 24cm-long x 14cm-wide x 7cm-deep baking dish, and sprinkle over half the coconut and a quarter-teaspoon of cinnamon. Top with the remaining filo, then pour over the warm milk. Sprinkle with the remaining quarter-teaspoon of cinnamon, the remaining coconut and the last 10g of sugar. Bake for 25 minutes, or until golden and bubbling, then remove from the oven and leave to cool for about 15 minutes. Top with the pistachios, barberries and pine nut clusters, and serve warm.

Sweet Tamarind Pie

If you like key lime pie then this NYT replacement using tamarind will suit you. 

Tamarind Cream Pie

INGREDIENTS

FOR THE CRUST:

  • 2 cups/170 grams digestive biscuit / graham cracker crumbs
  • 6 tablespoons/85 grams unsalted butter (3/4 stick), melted

FOR THE FILLING:

  • 1 large orange
  • 4 large egg yolks
  • 1 (14-ounce/400-gram) can sweetened condensed milk
  • ½ cup/120 milliliters tamarind paste, extract or concentrate (see tip below)
  • 1 to 2 tablespoons lemon or lime juice, to taste (from 1 lemon or lime)
  •  Pinch of fine sea salt

FOR THE TOPPING:

  • 1 cup/240 milliliters heavy cream
  • 1 tablespoon icing/confectioners’ sugar

PREPARATION

  1. Prepare the crust: Heat oven to 350 degrees, and place a rack in the center of the oven. In a large bowl, stir together crumbs and butter. Transfer mixture to a 9-inch pie plate, and press it into an even layer on the bottom and up the sides.
  2. Place pie plate on a rimmed baking sheet, and transfer to oven. Bake until golden brown, about 10 to 12 minutes. Transfer to a wire rack to cool.
  3. Meanwhile, prepare the filling: Halve the orange and squeeze the juice from one half. You should have 1/4 cup. If not, squeeze some juice from the other half. Reserve squeezed halves for zesting for garnish.
  4. In the bowl of an electric mixer, using the whisk attachment, beat egg yolks until pale and fluffy, about 5 minutes. Turn the mixer to low and slowly add condensed milk, scraping sides if needed. Whisk in tamarind and orange juice until just combined, then whisk in the lemon or lime juice and salt.
  5. Scrape mixture into cooled pie shell, then return to oven and bake until filling has just set, 15 to 20 minutes. Transfer to a wire rack to cool to room temperature, then refrigerate until completely chilled, at least 2 hours and up to 1 day.
  6. Just before serving, make the topping: In the bowl of an electric mixer, using the whisk attachment, beat together cream and icing/confectioners’ sugar until thick and fluffy. Dollop whipped cream on cooled pie. Finely grate the zest from one of the reserved orange halves over the top of the pie, and serve.

Tips

  • There are two distinct products that may be labeled tamarind extract, concentrate or paste. One is syrupy and nearly black, without any pulp. (Tamicon tamarind concentrate is one brand.) The other is lighter in color and pulpy; it looks like apple butter. (Swad is one brand.) Try to use the pulpy kind here: It’s fresher-tasting. But if you can get only the concentrate, use 1/3 cup and skip the lemon or lime juice.
  • You can also make your own paste out of pure dried tamarind fruit that’s either pulled directly from the pods or sold as a sticky brick. Soak the fruit in boiling water for 30 minutes to 1 hour, then drain. Use your hands or rubber spatula to mash it into a paste. Strain it through a fine mesh sieve. The fruit will vary a lot in its acidity, so use 1/2 cup of it for the pie, along with as much lemon or lime juice as you need to make you pucker.

Basbousa (Semolina cake)

This Egyptian recipe for sweet semolina cake is incredibly easy to make. It’s topped with a delicious rosewater and lemon syrup. SERVES 25–30 

Ingredients 

  • 2½ cupscoarse semolina
  • 90 g(1 cup) desiccated coconut
  • 220 g(1 cup) caster sugar
  • 75 g(½ cup) self-raising flour
  • 200 gthick yoghurt
  • 200 gunsalted butter, melted
  • 1 tspvanilla extract
  • 25–30 gblanched almonds 
  • milk, if needed

Syrup 

  • 330 g(1½ cups) sugar
  • 250 ml(1 cup) water
  • 1 tsplemon juice
  • 1 tsprosewater

Instructions

Preheat the oven to 190°C. Mix the semolina, coconut, sugar, flour, yoghurt, melted butter and vanilla in a bowl. If the mixture seems too thick, add a little milk, but it should still be fairly stiff. Spread the mixture with your hands into a buttered 30 cm x 25 cm x 5 cm baking tray. Cut it into diamond shapes, pressing hard. Place an almond in the centre of each diamond. Bake for 35–40 minutes or until golden brown.

Meanwhile, make the syrup. Place the sugar and water in a saucepan and bring to the boil, stirring until the sugar dissolves. Simmer for 5 minutes without stirring. Stir in the lemon juice and rosewater and remove from the heat. Leave to cool.

Pour the syrup over the cake while the cake is still hot. Cool to serve.

Lemon Snacking Cake With Coconut Glaze

A good cake for afternoon tea.

  • TIME1 hour, plus cooling
Lemon Snacking Cake With Coconut Glaze

INGREDIENTS

FOR THE CAKE:

  • ½ cup/120 milliliters neutral oil, such as grapeseed or canola, plus more for pan
  • 3 lemons
  • ½ cup/120 milliliters sour cream
  • ¼ cup/60 milliliters coconut milk
  • 2 large eggs
  • 1 ½ cups/185 grams all-purpose flour
  • 1 ¼ cups/250 grams granulated sugar
  • 1 teaspoon baking powder
  • ¼ teaspoon baking soda
  • ½ teaspoon fine sea salt
  • ½ packed cup/50 grams shredded sweetened coconut

FOR THE GLAZE:

  • 3 tablespoons coconut milk
  • 1 tablespoon coconut oil, melted
  •  Pinch of fine sea salt
  •  cup/85 grams confectioners’ sugar
  •  Finely grated lemon zest, for garnish
  •  Nutritional Information

PREPARATION

  1. Heat oven to 350 degrees. Grease a 9-by-9-inch pan, and then line with parchment paper, letting the two long ends hang over the edge of the pan by at least 2 inches.
  2. Grate 2 tablespoons of zest from the lemons. Juice the lemons so you have 1/4 cup/60 milliliters juice. Add juice and zest to a medium bowl, then whisk in oil, sour cream, coconut milk and eggs.
  3. In a large bowl, whisk together flour, sugar, baking powder, baking soda and salt. Whisk wet mixture into dry mixture until smooth.
  4. Scrape batter into baking pan and spread in an even layer. Sprinkle evenly with shredded sweetened coconut. Bake until the top of the cake springs back when lightly pressed in the center, and a toothpick inserted in the middle comes out clean, 35 to 45 minutes. Let cool completely.
  5. When cake is cool, make the glaze: In a small bowl, whisk together the coconut milk, oil and salt. Whisk in the confectioners’ sugar until smooth. Pour over the cake, and grate some lemon zest over the top. Let the glaze set for at least 30 minutes before serving.

Lemon tarts

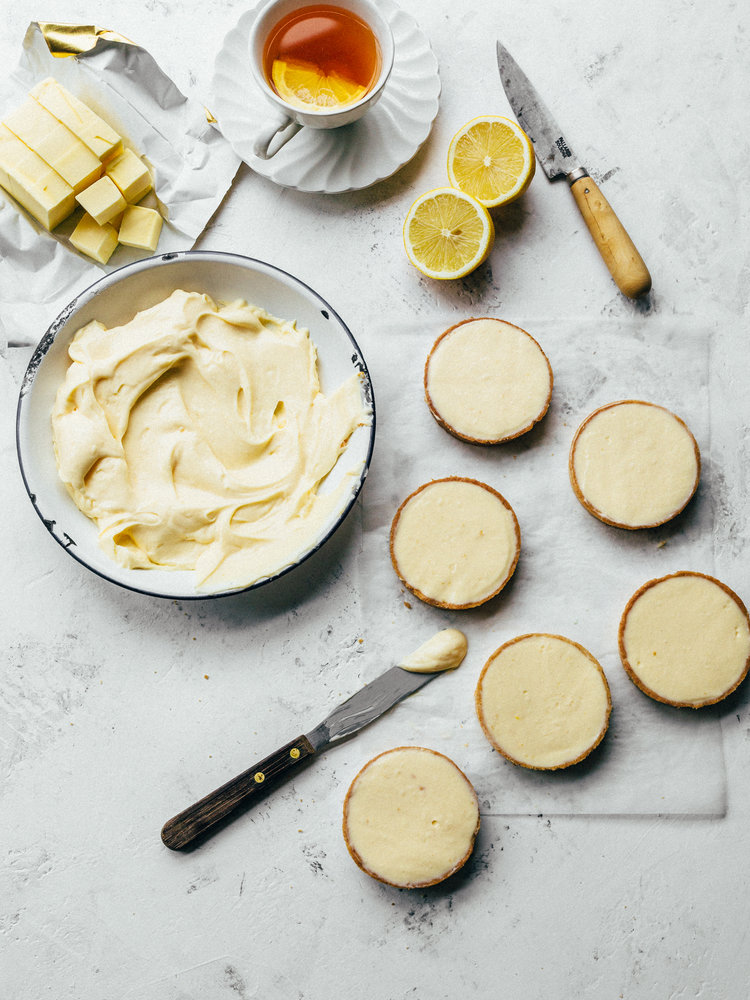
It was incredibly difficult to find a simple recipe for basic lemon tarts. This was the best I could find.

Lemon Tarts 2 (1 of 1).jpg

Lemon Cream Tarts
Makes 6

Lemon Cream
150ml lemon juice
zest of 3 lemons
2 large eggs
2 large egg yolks
150g caster sugar
225g unsalted butter, diced and at room temperature

Pate Sucree – just look up the recipe or use basic shortcrust

Start with the lemon cream or curd as it needs ample chilling time before it is ready to use. Add the lemon juice, lemon zest, eggs, egg yolks and caster sugar into a heatproof bowl set over a pan of simmering water and cook, stirring regularly until the mixture reaches 80c on an instant read thermometer. The temperature is key because it needs to be fully cooked like a custard so the finished cream holds the correct texture. I have said here to do this stage in a bain marie but half of the time I just place the ingredients directly into a saucepan and do this over a low heat stirring constantly. It is quicker than the bain marie method but it is also more prone to catching and overcooking so if you decide to do it this way be very careful and keep the heat down low. 

Once the custard is cooked pour it into a large jug, through a fine sieve to remove any cooked egg bits, allowing to cool for 15 minutes, when it should be about 60c. Using some form of blender (traditional jug style or stick blender both work great) blend in the butter a couple piece at a time. If using a stick blender do this in the jug you cooled the curd, the depth of the jug means you won’t end up incorporating too much air which you’re trying to avoid (the same reason it is best not to use a food processor). Once all of the butter has been incorporated pour the cream into a container, press a sheet of clingfilm onto the surface of the custard and refrigerate for at least fours hours, until the mixture thickens up. 

Remove the chilled pastry from the fridge and cut into six equal sized pieces and working with one at a time roll out, on a lightly floured worksurface, until 2-3mm thick. Use to line either six 10cm loose bottomed tart tins or as I do use tart rings, which give a more modern style. Trim off the excess and set onto a parchment lined baking tray. Line each tart with a piece of crumpled parchment paper and fill with rice or baking beans.

Blind bake the tart shells at 190c for about 15/20 minutes before removing the rice and parchment  and baking for a further 10 minutes or until the inside is nice and golden. Once baked set aside to cool. Once ready to serve remove the cream from the fridge and fill the tart shells. Set back in the fridge for about 30 minutes before serving to firm up again.

The cream can be made a few days in advance but once the tart shells are filled with the cream they are best eaten the same day.

Arancini

Having made risotto for a cold night, and being as yet entirely unable to cut down my recipes for just the two if us now that the girls are away at university, I thought I’d use the leftovers for arancini.

My risotto is always made wet i.e. on the soupy side of acceptable so it did take some drying off, but the recipe for arancini is so straightforward that it seems easy enough to include the risotto recipe as well.

Felicity Cloake's perfect arancini
 Felic

(Makes 10 medium balls)
800ml vegetable stock
250g arborio rice
½ tsp salt
Very generous pinch of saffron
50g parmesan or vegetarian alternative, grated
150g mozzarella, chopped into chunks
Fillings of your choice (meat ragu, pesto, sauteed mushrooms)
1 egg
170g plain flour
500g dried breadcrumbs
Vegetable oil, to cook

If you are using leftover risotto, skip this step. Otherwise, bring the stock to the boil in a medium pan, then tip in the rice, salt and saffron. Bring back up to the boil, then turn down the heat and simmer on a medium heat until the stock has been absorbed. Stir in the grated parmesan and season to taste, then leave to cool completely, preferably in the fridge – you can spread it out on a tray to hasten this if necessary.

Stir the mozzarella into the cool rice and check the seasoning. Roll a tablespoonful between wet palms to form a ball of your chosen size. Poke a hole in the middle and spoon your filling in, then plug the hole with extra rice. Repeat until all the rice is used up.

Beat together the egg, flour and enough water to make a thick batter (about 175ml), and season. Put the breadcrumbs on to a plate.

Heat the oil in a deep pan, no more than a third full, to 170C, or until a breadcrumb sizzles on contact. As it is heating, dip each rice ball into the batter to coat, then into the breadcrumbs, heaping them on top until it is well covered.

Cook in batches until golden brown, making sure the oil comes back up to temperature between batches, and drain on kitchen towel. Sprinkle with a little salt while still warm and serve hot or cold

Butternut and sage galette with orange caramel

For some unfathomable reason, my kitchen has no heating so in Winter it is the least hospitable part of the house. It means that at this time of year, I want to eat hot comforting food but I really don’t want to be cooking too much.

So inevitably I end up cooking too much and using the leftovers to make a meal on the following today, whether that’s boiled potatoes being roasted into a second meal, or as in the case roasted vegetable being used to make a tart on the following day. One of the great advantages of a cold kitchen is that the pastry inevitably turns out to be easy and very short. because it’s a free form tart, it’s quick and easy to knock up.

So either follow the recipe as written and cook the vegetables from fresh, or feel free to use it with any cooked vegetables left over from the ninth before. Butternut squash is great with oranges, but most root vegetables react well to a citrus lift.


Prep 30 min
Cook 1 hr 50 min
Serves 4

For the tart crust
100g plain flour
30g wholemeal flour
20g polenta
1½ tsp caster sugar
¾ tsp flaky salt
1 tbsp sage leaves, finely chopped (about 6 leaves)
80g unsalted butter, fridge-cold and cut into 1½cm cubes
20ml olive oil
60ml ice-cold water

For the filling
1 butternut squash, halved, deseeded and cut into ½cm-thick, skin-on half-moons (680g net weight)
2 carrots, peeled and cut into 1cm rounds 
2 tbsp olive oil, plus extra to finish
2 tbsp finely chopped sage leaves, plus 3 whole, to garnish
2 tsp caraway seeds, toasted and rushed 
Flaky salt and black pepper
1 head garlic, top cut off to expose the bulbs
banana shallot, skin on, top trimmed to expose the flesh
2-3 oranges, zest finely grated, to get 1½ tsp, and juiced, to get 160ml
50ml maple syrup
125g mascarpone
1 small egg, beaten

Heat the oven to 240C (220C fan)/465F/gas 9. For the crust, whisk together the first six ingredients with a good grind of pepper. Add the butter and oil, then incorporate the butter by squashing each cube between your fingers – don’t over-work it, though: you want chunks throughout the dough, so only squash it lightly. Add the water, stir to combine, then use your hands to gather the dough together – it will be quite sticky.

Transfer to a very well-floured work surface and roll into a 28cm x 18cm rectangle, flouring the rolling pin, surface and pastry as you go. Fold the longer ends in towards each other, so they meet in the middle, then roll out once. Now fold in the shorter ends to meet in the middle, roll out once more, then fold in half, so you end up with a square. Use your hands to stretch the dough into a 14cm circle, then wrap in clingfilm and refrigerate for 30 minutes.

While the dough is chilling, toss the squash and carrots in the oil, a tablespoon of chopped sage, the caraway, a teaspoon of salt and plenty of pepper. Spread out on two large oven trays lined with baking paper; don’t worry if there is some overlap. Drizzle the garlic and shallot with a little oil, wrap both separately in foil, and put on one tray.

Roast the butternut and carrots for 25 minutes, or until golden brown, then remove from the oven. Leave the garlic and shallot to roast for 15 minutes more, then remove and, once cool enough to handle, squeeze out the flesh and finely chop. 

Turn down the oven to 220C (200C fan)/425F/gas 7. Transfer the dough to a well-floured surface and roll out into a 30cm circle, dusting the rolling pin as you go. Gently lift the dough on to a baking tray lined with greaseproof paper and refrigerate for another 30 minutes.

Put the orange juice and maple syrup in a medium saucepan on a medium-high heat and cook for about 10 minutes, or until it reduces to the consistency of a thick, sticky syrup.

In a small bowl, mix the mascarpone with the chopped roast garlic and shallot, the orange zest and remaining chopped sage. Season with a pinch of salt and plenty of pepper, and stir again to combine.

Spread the mascarpone mixture over the dough, leaving a 4cm border around the edge. Scatter the butternut and carrot haphazardly over the top, to cover, then drizzle over the orange caramel.

Fold the edges of the pastry up and over the filling, brush the exposed pastry with the egg, then bake for 30 minutes, until crisp and golden brown. Leave to cool for 20 minutes, then serve with the remaining sage leaves roughly torn over the top.

Breakfasts Pistachio, rose and strawberry buns

Every morning, rows and rows of fresh fruit greet us as soon as we leave Warren Street tube station.

The fruit-sellers are there come sun or dreadful rain, making the morning that much nicer and giving our day a colourful start, with mounds of apples, pears, persimmons and mandarins in autumn, British berries in the spring and all kinds of peaches in the summer.

Makes eight muffin-sized buns

Ingredients

For the basic bun dough

  • 70g unsalted butter, diced and at room temperature
  • 20g fresh yeast (or 1½ tsp dried yeast)
  • 1 whole egg
  • 30g caster sugar
  • 80-100ml milk
  • 300g strong white bread flour

Pinch of table salt Place the butter, yeast, egg, sugar and 80ml of the milk in a large mixing bowl, then top with the flour and salt. Use the dough attachment on your mixer or your hands to bring it all together to a smooth, shiny dough, adding the remaining 20ml of milk if it looks dry. Don’t worry if you still have some flecks of butter running through the dough; they will make your final bun super-light.

Once the dough has a nice texture, (after about 2-3 minutes with an electric mixer or 5-6 minutes working by hand), wrap the bowl in cling film and place in the fridge to chill for at least 2 hours. You can leave it there for up to 12 hours but not much longer or it will start to prove.

Ingredients For the sugar syrup

  • 100ml water 100g caster sugar
  • 1 tbs glucose or honey
  • 1 tbs rosewater

For the pistachio cream

  • 80g pistachios
  • 80g unsalted butter, at room temperature
  • 80g caster sugar
  • 1 egg
  • 1 tbs plain flour
  • 8 tsp strawberry jam

To make the sugar syrup, heat the water, sugar and glucose/honey in a pan and stir to dissolve sugar. Bring to the boil, skim off any foam, remove from heat and reserve.

Blitz the pistachios in a food processor until they resemble breadcrumbs. Add all the other pistachio cream ingredients (except the jam) and pulse until they form a paste.

Butter an eight-hole muffin tin or eight individual pudding moulds. Remove the dough from the fridge and roll out on a lightly floured work surface to a rectangle of 40cm x 20cm. You may need to flip the dough once or twice to create a smooth, even rectangle, but try to work with as little flour as you can so as not to dry the dough out.

With a sharp knife, cut a 2 x 4 grid into the dough so that you have eight squares of 10cm x 10cm. Lift each square into a pudding mould or cup of the muffin tin and push it all the way down. Allow the excess dough to hang over the sides. Divide the pistachio cream between the squares, then top with a teaspoon of strawberry jam. Fold the corners over lightly to cover the filling. You can freeze these if you want to, but if you are ready to bake today, preheat the oven to 200C.

Allow the buns to prove in the muffin tin/moulds (30-40 minutes). You can tell they are proved when the little dough triangles on the top start poking up. Place in the centre of the oven and bake for 10 minutes, then turn them to bake evenly. Reduce oven to 180C and bake for another 10 minutes. Remove from oven. Brush generously with the sugar syrup laced with rose water and allow to cool slightly in the tin or moulds before serving.

Coffee

Over the years I have tried out many different ways of making a decent cup of coffee, from my inglorious youth spent quaffing instant *coffee* through to full on grind your own beans espresso.

It sounds obvious but is worth saying that each method tastes slightly different. I have never managed to make coffee in those metal stove top pots, so popular in Italy, without it tasting burned. Espresso always tastes a fraction forced or rushed.

A trip to Namibia reintroduced me to the speed and convenience of basic cafetiere coffee which is where I go for my first morning wake-up cup but there’s no doubt that speed comes with consequences. Cafetiere coffee is just too variable, sometimes weak, sometimes strong and often grainy.

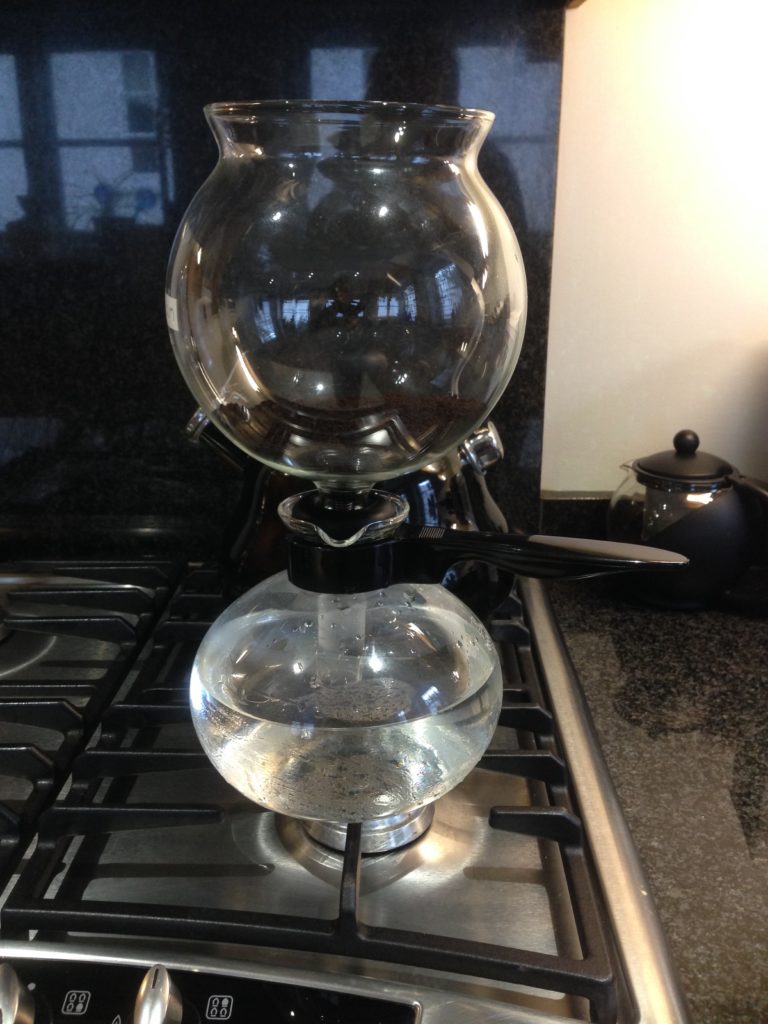
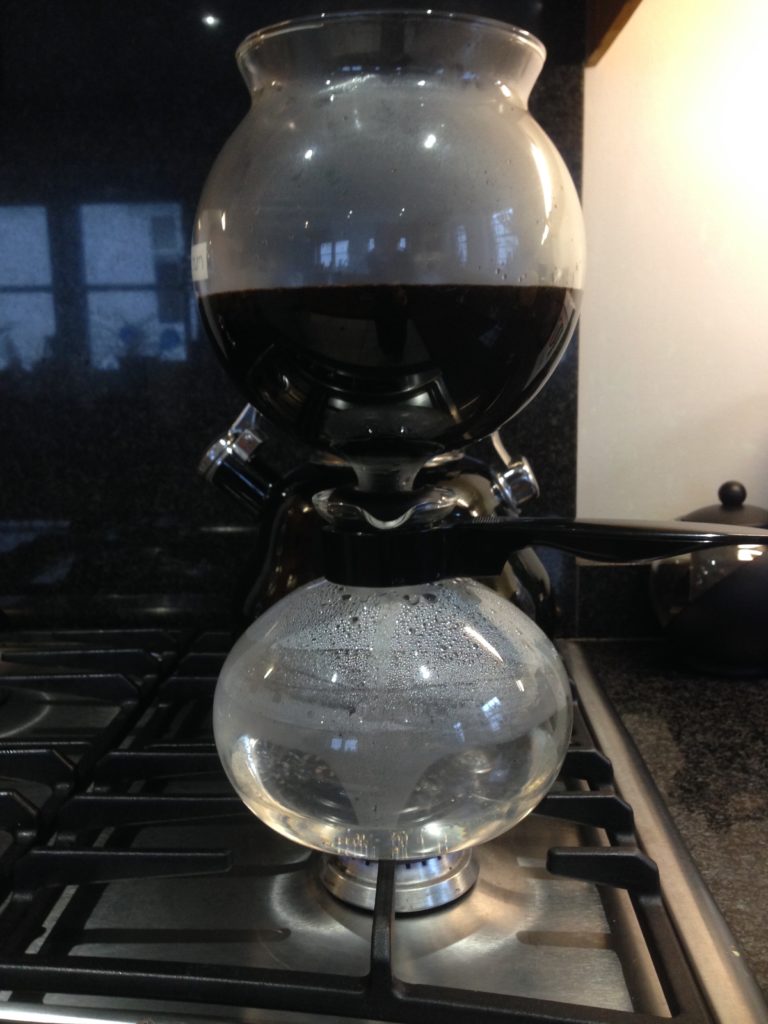
Over Christmas I gained a new toy, a bodum vacuum coffee maker based on the old cona style stove top and it makes a wonderful smooth, controlled cup of coffee (or three). The drawback with this method is the volume – you can’t make a single cup easily.

But given how smooth it turns out, it seems worth setting up and running for morning coffee because waking up is always more than a one cup, one person affair.

And it is marvellously entertaining to sit and watch vacuum do its thing.

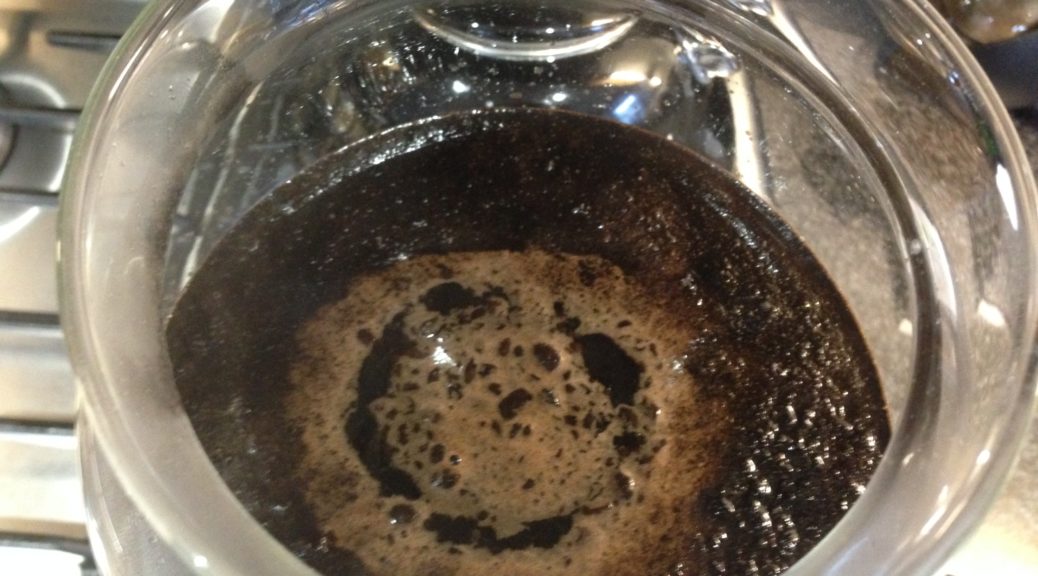
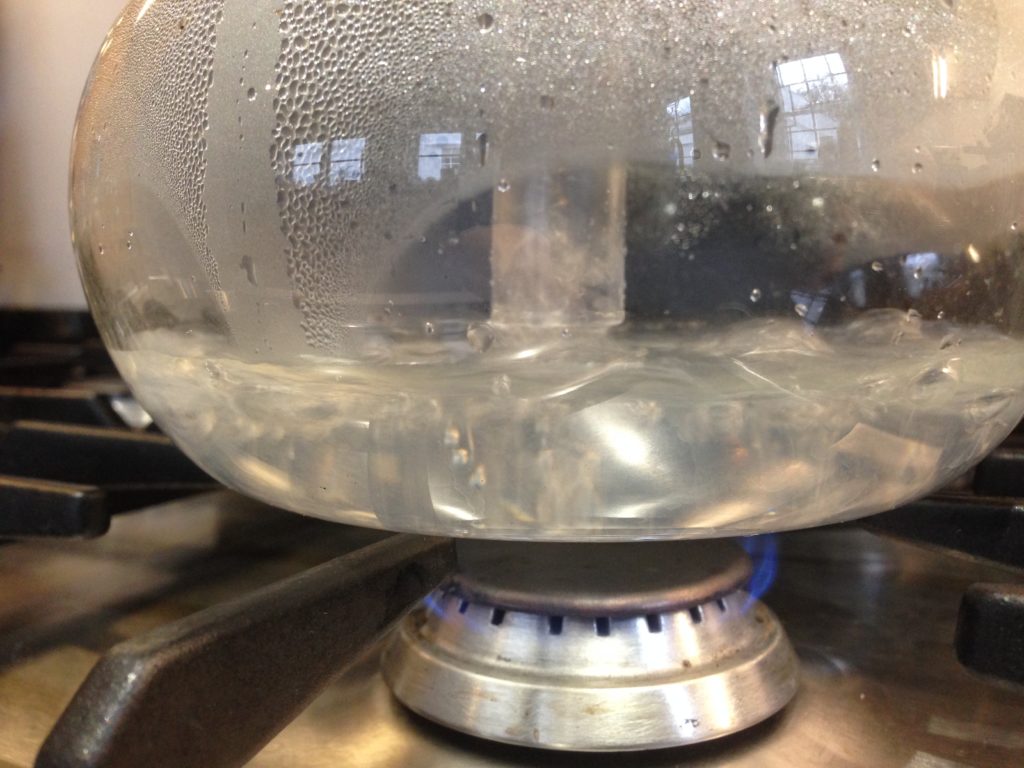
Water is put into the bottom pot and ground coffee on the top. It all sits on the hob and heats, relatively gently until the water starts to evaporate and rise up the funnel to the coffee grinds where it mixes. Once the water is almost gone, the heat is removed and the water is sucked back down through the funnel with the filter holding back the grinds.

Festive-spiced apple bundt cake

  • Preparation time:20 minutes, plus cooling
  • Cooking time:55 minutes
  • Total time:1 hour 15 minutes, plus cooling

Serves: 10-12

Ingredients

280g unsalted butter, softened, plus 20g melted, for greasing 
330g self-raising flour, sieved, plus extra for dusting 
280g golden caster sugar 
3 tsp ground cinnamon 
4 tsp ground ginger 
2 tsp ground mixed spice 
½ tsp fine salt 
5 large eggs 
450g peeled and cored cox or gala apples (about 5-6), 170g grated, 280g chopped into 1cm chunks 
20g icing sugar, for dusting 

MASCARPONE CREAM 
300ml double cream 
250g mascarpone 
1 tbsp golden syrup

Method

1. Preheat the oven to 180˚C, gas mark 4. Brush a 2.4 litre bundt tin with ½ the melted butter, being careful to get it into all of the grooves. (We used the Nordic Ware non-stick heritage bundt pan * but any bundt tin will work. You could also use a deep, round 23cm cake tin instead; just grease and line it first.) Chill for 5 minutes, then coat with the remaining melted butter; dust all over with flour. Turn and tap the tin on the work surface to ensure every groove is coated with a light covering – this is key to ensuring the cake turns out cleanly. 

2. Cream the butter with the sugar using a freestanding mixer (or electric beaters) on high for 10 minutes until very pale and fluffy. Meanwhile, combine the flour, spices and salt in a bowl and lightly whisk the eggs in a jug. Slowly pour ½ the beaten eggs into the butter mixture, while beating on a medium speed. Add a spoonful of the flour mixture, then beat in the remaining eggs. Fold in the rest of the flour mixture until just combined, then gently stir in the grated apple. 

3. Spoon a little of the mixture into the tin, just to cover the base. Stir the chopped apple into the remaining mixture and pour into the tin. Spread the mixture with a spatula, creating a slight dip in the centre the whole way around the ring, to give an even rise. Bake for 45-55 minutes (if using a round cake tin, it might need 5-10 minutes more), until a skewer comes out almost clean (it will continue to cook slightly in the tin, so try not to overbake it). 

4. Leave to cool in the tin for 20 minutes, then turn out onto a wire rack and leave until completely cool. Meanwhile, whisk the cream until just holding its shape. In a separate bowl, beat the mascarpone with a spoon until smooth, then stir in the cream and golden syrup. Dust the cake liberally with icing sugar and serve each slice with a dollop of the cream. Alternatively, serve warm with caramel sauce for an indulgent pudding.